Cooking and Preserving Without Equipment
Fire, stone, and smoke: how to make edible what kills raw, and make last for months what rots in a day.
You’ve found food—pockets full of acorns, a fish still wiggling, handfuls of nettles. Good news: the forest provides. Bad news, nobody told you loud enough: half of what you just gathered can make you sick if you eat it as is. The other half will turn into a meal thanks to a single tool you already have: fire. Survival cooking isn’t a luxury for gourmets; it’s the action that separates “I found food” from “I ate.”
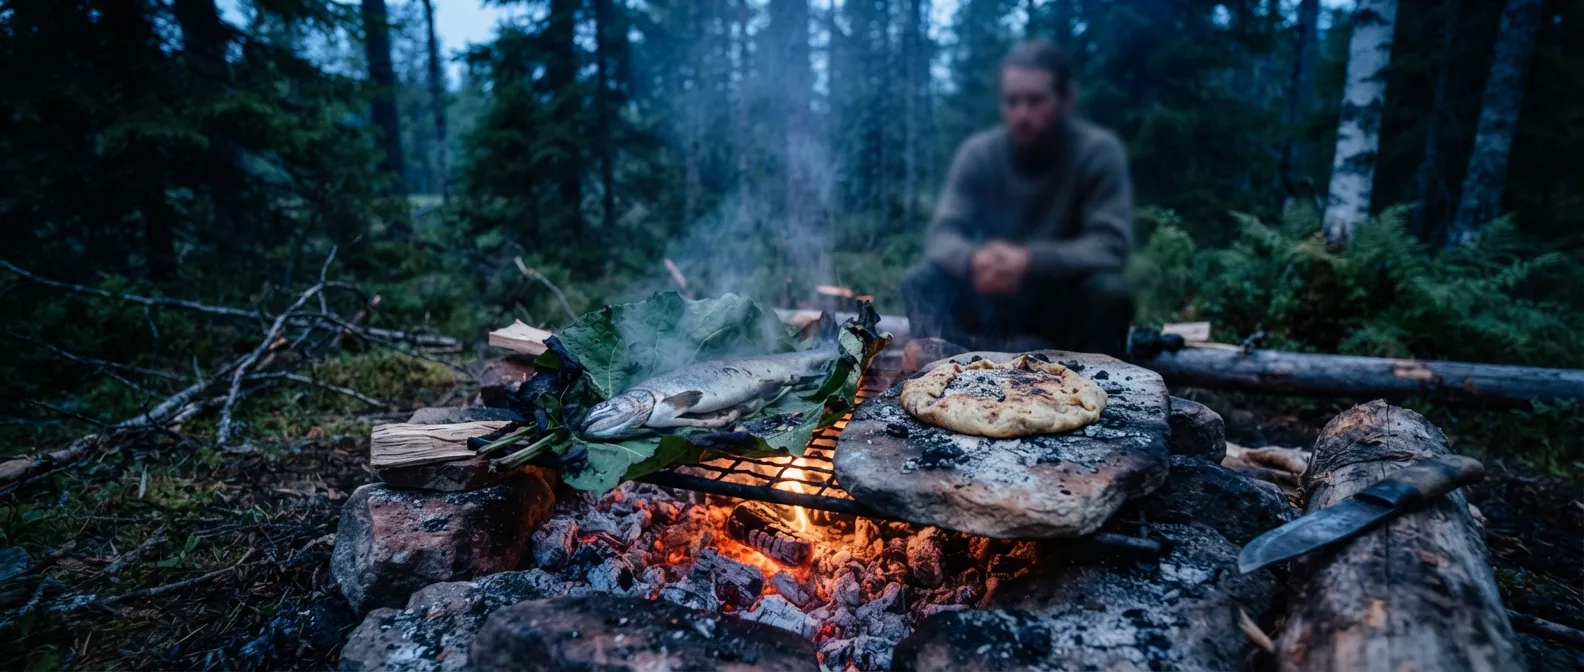
Why cook: the true purpose of cooking
Cooking isn’t just about taste. It’s a chemical process that makes edible what otherwise isn’t:
- Parasites and bacteria. Heat kills trichinella larvae in wild boar, liver fluke eggs on wild watercress, and salmonella on improperly bled meat. This is the number one reason, way before flavor.
- Digestibility. Raw starch is hard to digest; cooked, it swells and becomes usable. Carbohydrates in tubers, cattail rhizomes, or burdock roots only truly nourish you once cooked.
- Tannins. Bitter and astringent, they block protein absorption and cause nausea in high doses. Acorns are loaded with them—which is why you never chew them raw.
- Saponins. These foaming molecules in certain wild legumes and roots irritate the gut when raw; cooking largely neutralizes them.
- Cyanogenic glycosides. Raw cassava and bamboo shoots both contain them—this is the most dangerous case of all, detailed below.
The case of cassava, bamboo, and acorns: the invisible cyanide
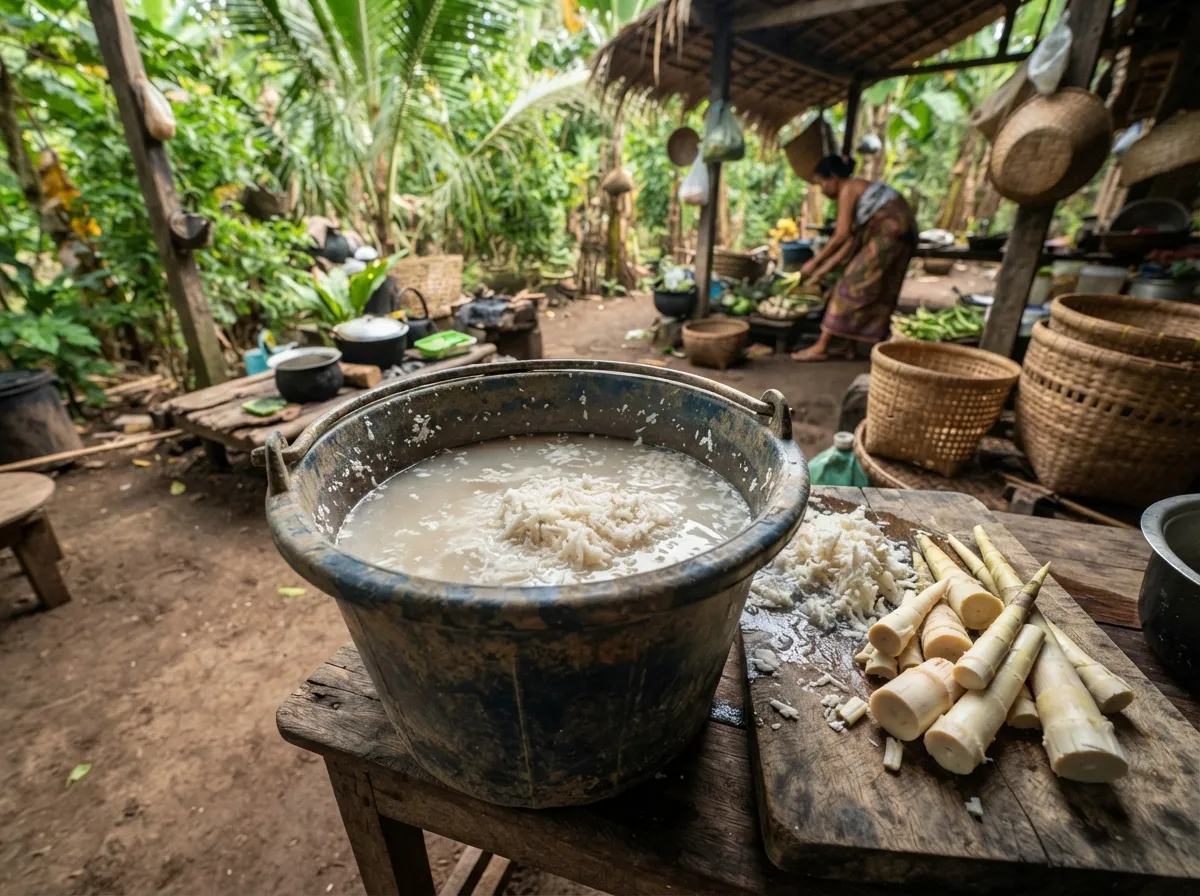
Cassava (the staple root for hundreds of millions of people in the tropics) contains linamarin, a cyanogenic glycoside: an enzyme in the cassava itself turns it into hydrogen cyanide as soon as the root is cut or crushed. “Sweet” varieties contain as little as 20 mg/kg, while “bitter” varieties contain up to 1,000 mg/kg. The traditional West African preparation—peeling, grating, and letting the wet pulp ferment for 48 to 72 hours—eliminates 85% to 99% of the cyanogenic potential. A simple soak of 18 to 24 hours removes about half the cyanide; four hours is not enough. Chronic exposure to improperly prepared cassava causes konzo, an irreversible leg paralysis documented during famines (China 1958–1962) and food shortages (Venezuela late 2010s).
Raw bamboo shoots contain the same cyanogenic glycosides as cassava. The rule is simple: never raw, always boiled thoroughly before any other use—frying, preserving, or stir-frying.
Acorns do not contain cyanide, but tannins that make raw acorns astringent and laxative in high doses. Two leaching methods: cold water, over several days while changing the water; or boiling water, three to four water changes in under an hour—though hot water cooks the acorn starch, which hinders baking. To make flour, California Native Americans and Koreans preferred cold-water leaching.
Cooking without any containers
This is the most common survival scenario: you have a fire, you have food, but you have no pot or pan.
The hot rock—and why never to use a river rock
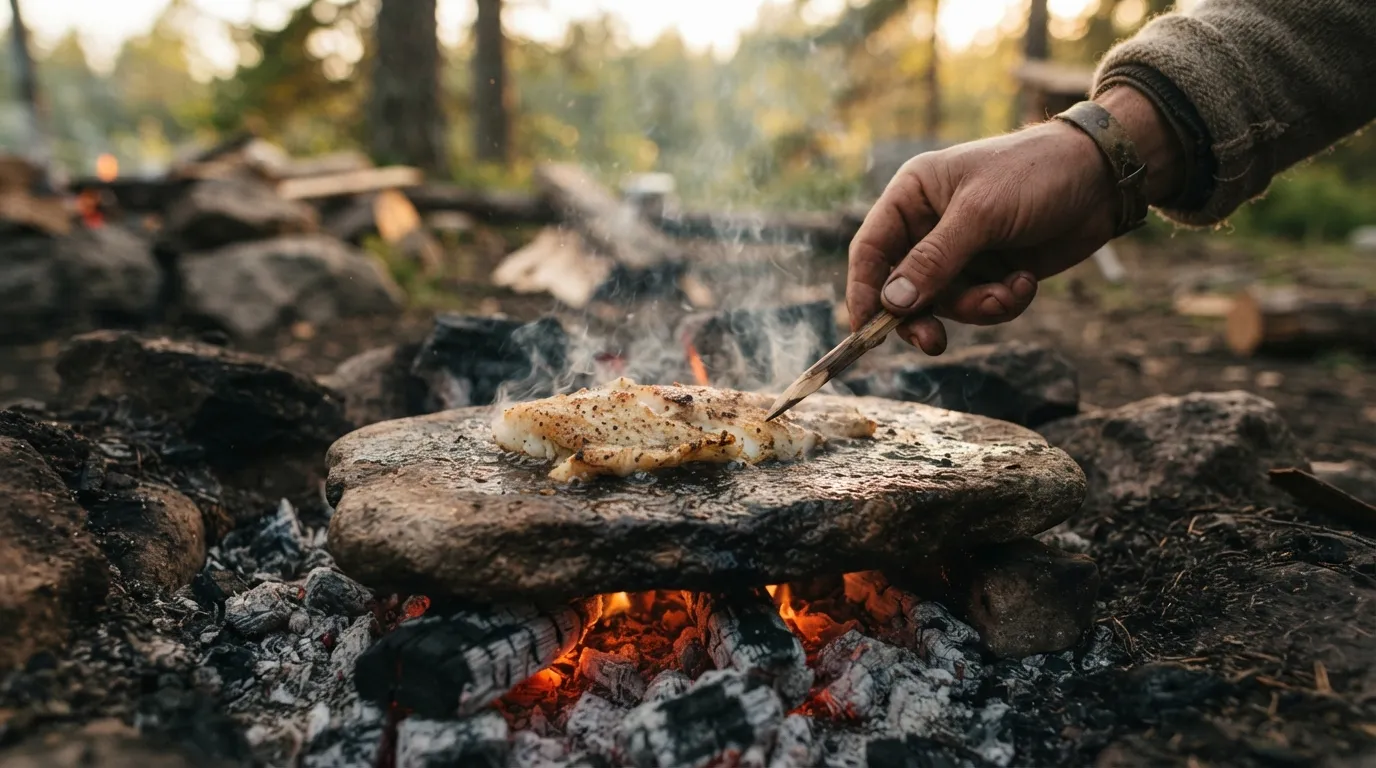
A flat rock placed at the edge of the fire, or right in the embers, makes a decent griddle: you can brown bread, grill fish, or sear meat. FM 21-76 states a prohibition repeated twice in the manual: never use rocks with air pockets, such as limestone or sandstone—“they may explode.” The reason is physics: a porous stone soaked in water (which describes almost any river stone) turns that trapped water into steam under heat, and the pressure has nowhere to go—the rock shatters, blasting scorching shrapnel. Look for a rock that has been dry for a long time, gathered far from water, preferably a dense igneous rock (granite, basalt) without visible veins. Simple test: if it sounds dull when tapped or feels damp to the touch, discard it.
Skewers and clay baking
A green wood skewer (never resinous, which tastes like turpentine) stuck at an angle above the embers remains the most universal method—whole fish, chunks of meat, small mushrooms. For a whole fish or tuber, clay creates a disposable oven: coat the food (scaled but uneviscerated—the guts come away with the skin when opened) in 2 to 3 cm of clay, bury it in the embers, and crack open the hardened shell once cooked. Internal steam bakes the food, and the skin or scales peel off attached to the clay.
Leaf cooking
Wrapping food in large fresh leaves before placing it on embers or in an earth oven protects it, holds in moisture, and adds a delicate flavor. Common leaves worldwide: banana (Asia, Pacific, tropical Americas—large, waterproof, heat-resistant), corn husks (tamales), cabbage or wild chard in temperate climates. Avoid leaves with white latex (many toxic euphorbs) and any you cannot identify with certainty.
The earth oven: hāngī, umu, Polynesian pit oven
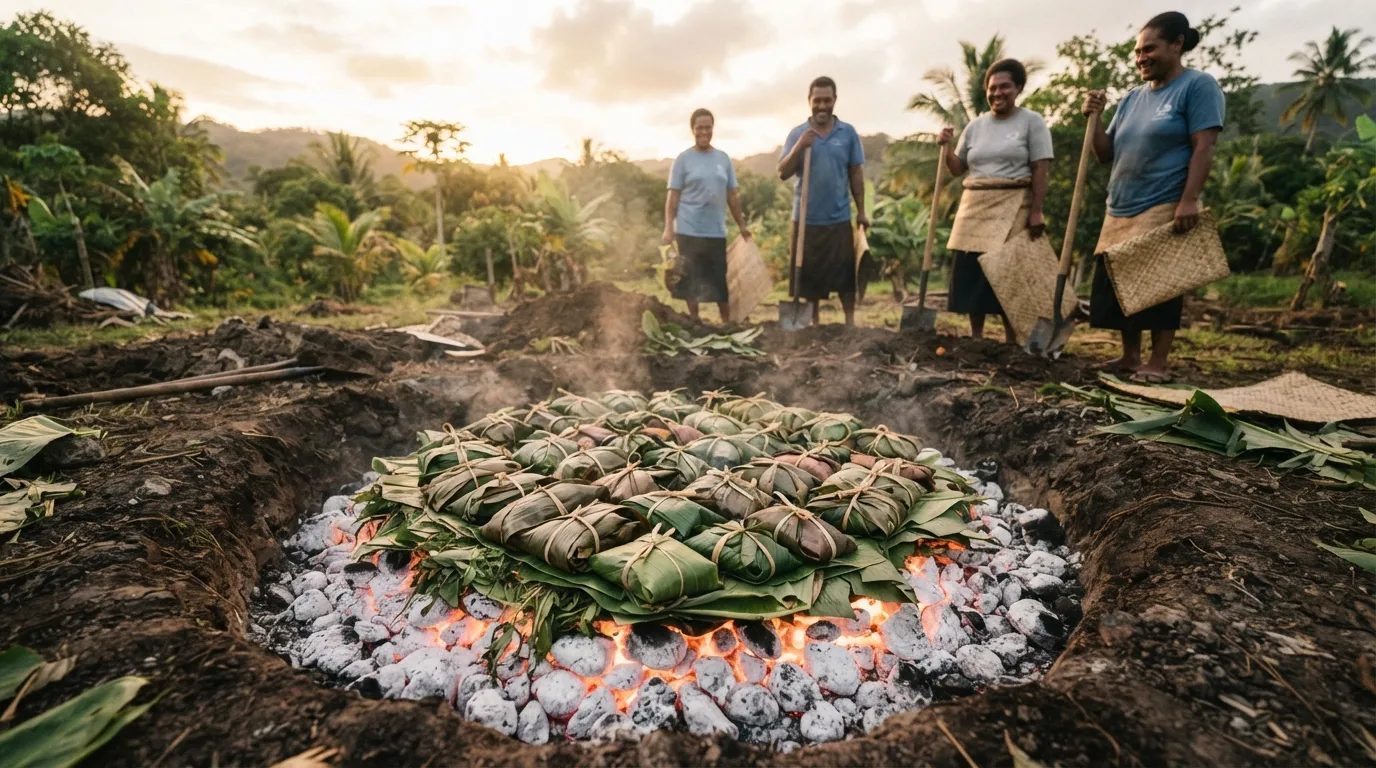
The pit oven is one of the most universal cooking techniques on Earth: the Maori hāngī, Samoan umu, Hawaiian kālua, Chilean curanto, Peruvian pachamanca, and Tahitian ahima’a are regional variations, all built on a principle at least 29,000 years old (the earliest known pits date back to that era in Central Europe). For a traditional hāngī: a pit 50 to 100 cm deep, dense rocks (andesite, basalt) heated for 3 to 4 hours up to 600–700 °C, embers cleared out, food (meat on the bottom, vegetables in the middle, quick-cooking items on top) placed over the rocks wrapped in leaves, and the whole pit covered with soil for 2 to 4 hours. For a solo survivor short on time, it wastes a ton of wood—save this technique for an occasion that warrants it: big game, or a night when you aren’t moving camp.
| Hot rock | Clay | Leaves | Earth oven | |
|---|---|---|---|---|
| Required gear | Flat dry rock | Moist clay | Large leaves | Pit + large stones |
| Prep time | Immediate | 10-15 min | 5 min | 3-4 hrs heating |
| Wood consumed | Low | Low | Low | High |
| Best for | Fish, flatbread | Whole fish, tubers | Fish, vegetables | Large cuts, group meals |
Cooking and boiling with improvised containers
Boiling water—to cook, purify, or make tea—without a metal pot relies on a single physics principle: as long as liquid remains in contact with a wall, that wall will not exceed 100 °C, the boiling point of water. Paper, bark, or plastic burn at significantly higher temperatures. This makes it possible to boil water in materials you’d instinctively think are flammable.
- Birch bark, folded into a stitched cone or shaped into a bowl, placed directly over moderate embers: the water inside prevents the bark from catching fire as long as the liquid level stays above the embers—a technique documented among many North American forest tribes in the birchbark canoe tradition.
- A plastic bottle (PET), set at the edge of embers, never in direct flames: narrower margin of error, as PET softens around 70–80 °C. Only the water-filled portion is protected—above the water line, the plastic melts in seconds.
- An aluminum can, stripped of its inner liner, withstands direct fire and serves as a mini-pot or the base for an improvised hobo stove: a can punched with air holes at the bottom and a fuel opening warms via convection.
- Hot rocks in a flexible container (hide, bark, tight-woven basket, cleaned stomach): heat rocks in the fire, drop them one by one into the liquid, replacing them as they cool. This stone boiling technique is documented back 4,800 years in the North American Great Plains, and was widely used in Polynesia to extract nut oil, render bone fat, and cook stews.
With a real container
If you have a single-walled metal canteen (never double-walled insulated models, which will explode), place it directly on the embers. The classic piece of Anglo-Saxon bushcraft gear is the billy can, a metal pot with a bail handle suspended from a three-legged tripod tied at the top, or hanging from a pot crane. The tripod distributes weight across three stable points even on uneven ground, allowing you to adjust cooking height—and thus heat intensity—simply by changing the hanging point.
Embers vs. flames: the choice that changes everything
Two fire layouts are particularly suited for cooking, alongside those already covered in the fire module (the Dakota fire pit which concentrates heat under a pot, and the star fire which yields consistent coals):
- The trench fire: a narrow, elongated trench, deeper at one end to create a draft, concentrating heat beneath a long row of skewers or an improvised griddle. Great for cooking multiple items at once while shielding flames from the wind.
- The keyhole fire: a round fire pit connected to a narrower channel shaped like a keyhole from above. Maintain the main fire in the round pit, then rake hot coals into the narrow channel to place your cookware—providing steady, smoke-free heat while the main pit keeps producing fresh coals.
Real survival recipes that actually work
Bannock
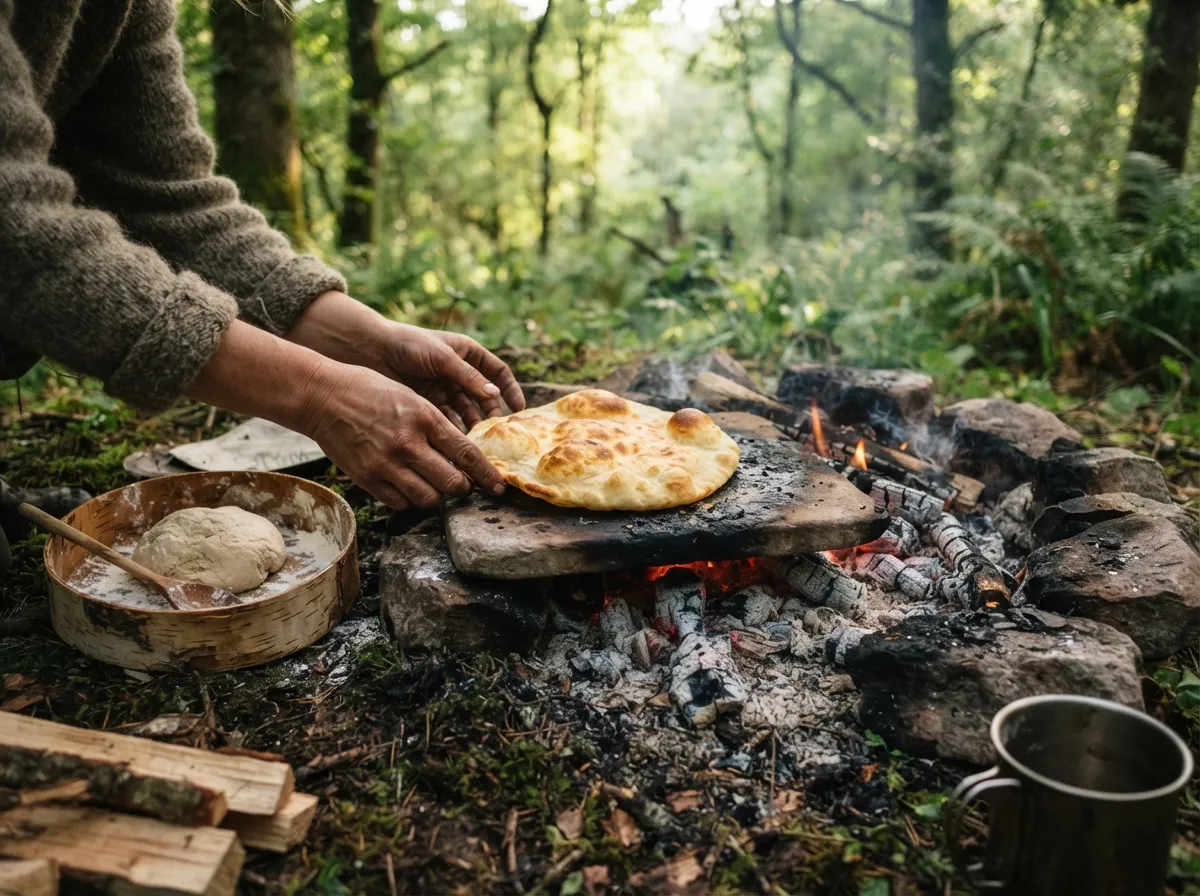
Bannock, from the Scottish Gaelic bonnach, is the most widespread survival bread in North America—trappers and Indigenous peoples from the Far North to the Pacific Coast relied on it as daily bread. Base recipe: flour, a pinch of salt, a little baking powder or baking soda if available (otherwise a dense flatbread, equally nourishing), water, a little melted fat. Knead minimally, press into a 1 to 2 cm flatbread, cook in a pan, wrapped in a spiral around a stick (“bannock twist”), or baked on a clean hot rock.
Nettle soup
Gather young shoots (wear gloves—stinging hairs contain formic acid and histamine, irritating skin for 15 minutes to 2 hours), blanch them for two to three minutes in boiling water: the heat instantly destroys the stinging hairs. Chop, sauté with a wild onion if you find one, add water, and simmer for ten minutes. Nettles provide 4.3% to 8.9% protein by fresh weight, along with iron, calcium, and vitamins A and C—a rare yield for a “weed.”
Acorn flour
After leaching out the tannins (see above), dried acorns are ground between two stones or pounded coarsely, then sifted into flour. Rich in starch but gluten-free, this flour won’t rise on its own: mix it equal parts with cereal flour if you have any, or cook it as is into a thick porridge or small flat cakes baked on a hot rock.
Cattail porridge
Rhizomes of cattails (Typha) contain starch comparable to corn or rice, delivering about 266 kcal per 100 g once processed into flour—though the fibers are tough, so you must scrape or suck the starchy pulp free. In spring, young shoots can be eaten raw or cooked like asparagus; in early summer, male and female flower spikes can be boiled and eaten like corn on the cob.
Pemmican: the recipe, the ratio, and why it lasts
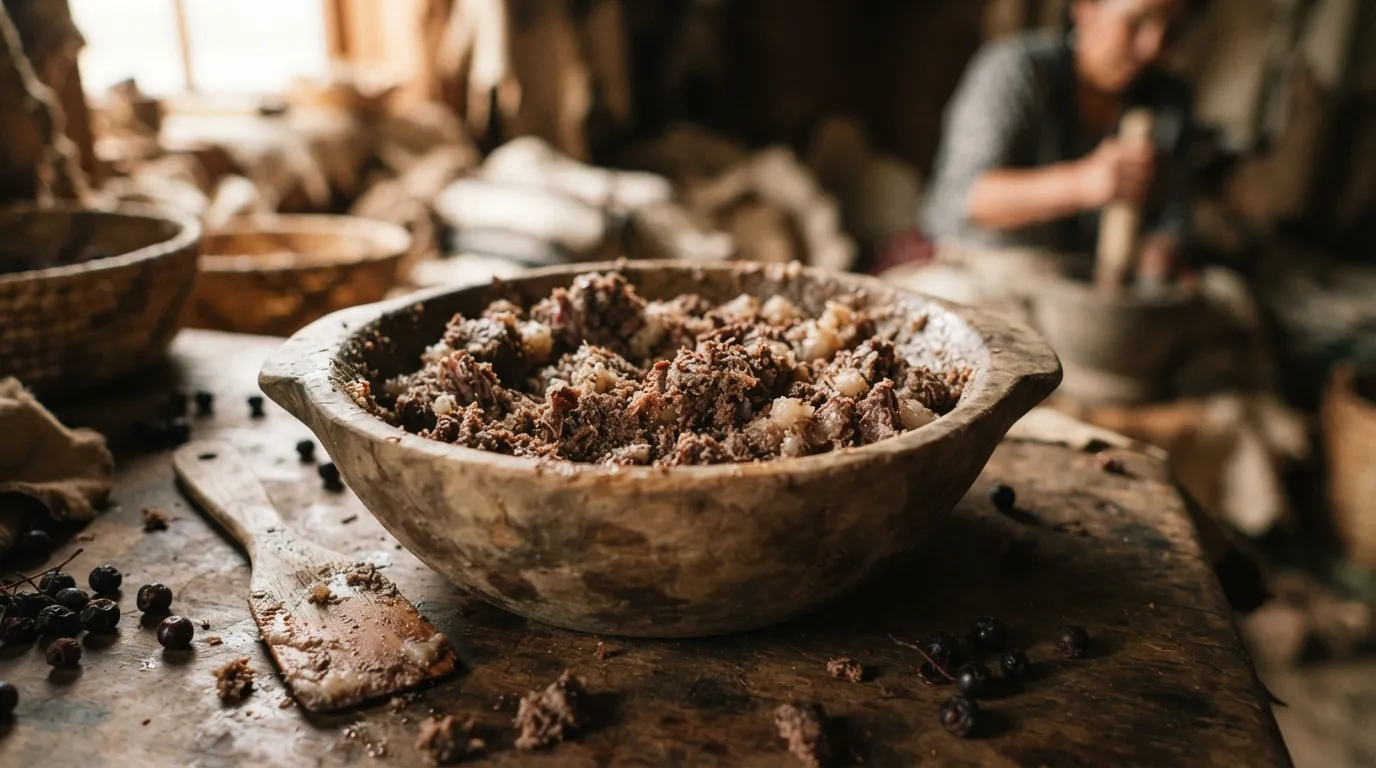
The word comes from the Cree pimîhkân, from pimî, “fat.” The recipe has remained virtually unchanged for centuries: dry lean meat (game, beef) until it is hard and brittle—about five pounds of fresh meat yields one pound of dried meat—then pound it into a fine powder. Mix this powder with rendered fat (tallow) at an approximate 1:1 ratio by weight, optionally adding crushed dried berries, and pack it tightly into rawhide or a waterproof bag.
What renders pemmican practically immortal is the fat: coated completely, the dried meat is sealed away from air and moisture, the two primary drivers of spoilage. British army pemmican rations from the Boer War were recovered “in perfect condition after decades.” Robert Peary called it an absolute necessity for polar expeditions; Amundsen and Shackleton depended on it just as heavily. Without fat, dried meat alone (jerky) lasts weeks to a few months; encased in fat, pemmican lasts for years.
Jerky
The word originates from Quechua ch’arki, “dried, salted meat.” Slice meat into 6 mm strips along the grain (never across, or it snaps too easily), salt lightly, and spread on a drying rack exposed to sun and wind, safe from flies. It’s done when it is brittle, not just dry on the surface. Incas in the cold, high Andean valleys (Puno, Cusco) practiced a form of natural freeze-drying by taking advantage of dry, freezing night air and intense high-altitude sunlight.
Paper-wrapped fish, snails, grilled insects
Fish in leaf wrappers is covered above. Land snails with shells are, with extremely rare local exceptions, all edible—the real hazard isn’t toxicity, but what they recently ate. Traditional purging: starve them or feed them exclusively flour for eight to twelve days, discarding any that die, then wash thoroughly. In a pure survival situation, a short 1- to 2-day purge reduces risk significantly. Cooking: boil in salted water for fifteen minutes, or place directly on embers until they pull away from the shell.
Insects are, according to the FAO, consumed by roughly 3,000 ethnic groups, with nearly 2,000 documented edible species worldwide—grasshoppers, locusts, beetle larvae, caterpillars (avoid stinging processional caterpillars), and ants. Always dry-roast them on a hot stone or directly over embers for a few minutes: heat destroys parasites. Always strip away stiff wings and spiny legs before eating.
Birch sap and forest teas
Birch sap, harvested in spring via a shallow tap two to three weeks before leaf burst, contains only about 1% sugar—ten times less than maple sap. It takes roughly 110 liters of sap to boil down to 1 liter of syrup, compared to 40 liters for maple, and its main sugar (fructose) burns easily: scorching it leaves a burnt caramel taste. In a survival situation, don’t boil it down to syrup—drink the sap fresh or gently warmed to hydrate and get quick sugar and minerals.
Pine needle tea (freshly chopped needles steeped in hot water, never boiled hard to preserve vitamin C) is a well-known source of vitamin C in temperate and boreal forests. Use needles from safe species (Scots pine, eastern white pine, Douglas fir); avoid ponderosa pine and yew, which are toxic. Bramble tea (dried wild blackberry leaves steeped in hot water) is a mild, traditional European drink rich in light tannins.
Preserving without refrigeration
| Drying | Smoking | Salting | Pemmican | |
|---|---|---|---|---|
| Principle | Sun and wind, thin strips | Hardwood smoke, gentle heat | Osmosis, salt ~20% of weight | Dried meat + fat 1:1 |
| Treatment time | Several sunny days | One night to two days | A few days to weeks | Drying then mixing |
| Shelf life | Weeks if completely dry | 1 to 2-4 weeks | Months | Years |
| Primary pitfall | Flies, residual moisture | Resinous wood ruins flavor | Under-salting | Meat too lean |
Drying
Cut into 6 mm strips along the grain, place on drying racks (elevated lattice of crossed sticks) that allow air to circulate above and below, in full sun and wind, protected from flies (drape gauze or lightweight cloth over without touching the meat). It is ready when brittle, never when it merely feels dry on the surface—moisture inside can cause it to rot from within.
Smoking
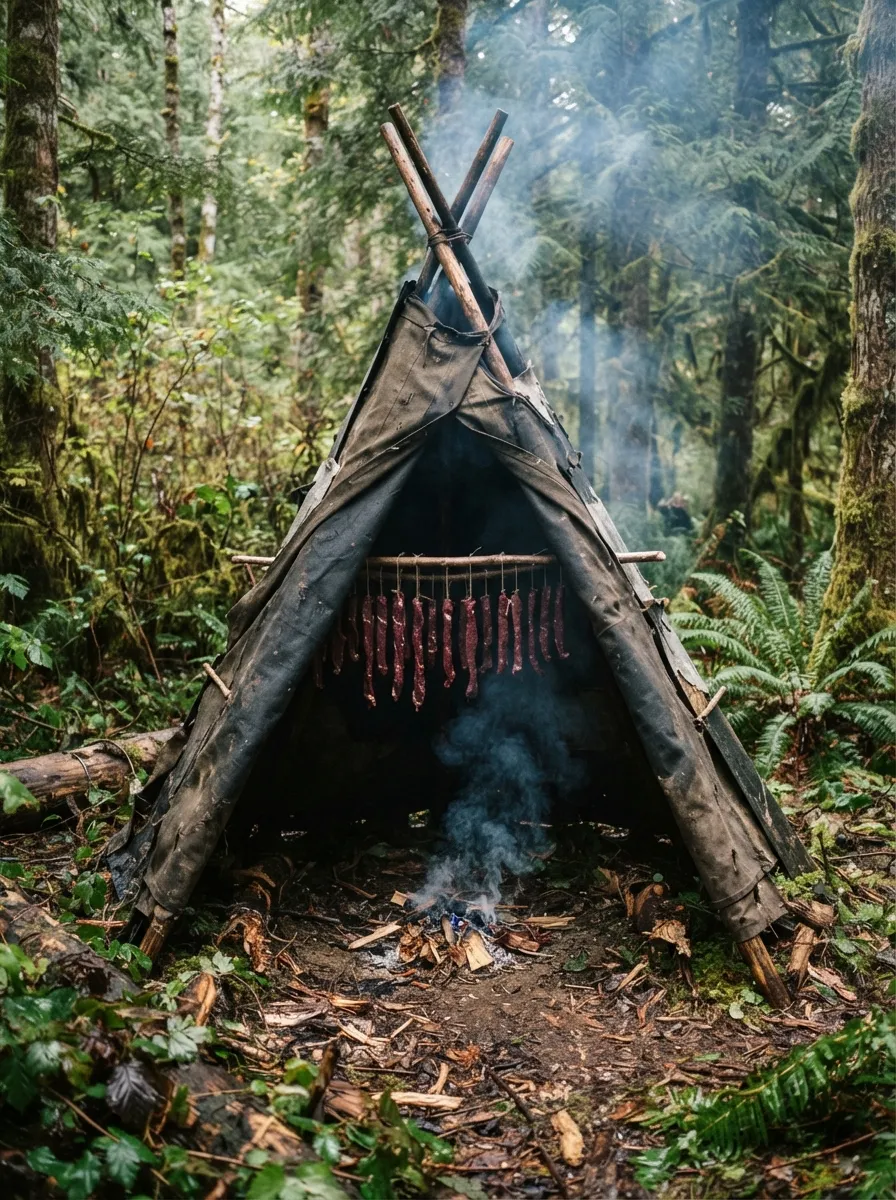
The concept: produce smoke, not heat. A pole tipi covered with a tarp, strips hanging clear of one another, and a fire of hardwood that is slightly green or dampened so it smolders rather than blazes. Phenolic compounds in smoke provide real antioxidant and antimicrobial effects, but smoke alone won’t preserve meat without prior salting or drying—it slows spoilage, it doesn’t stop it.
Good smoke wood vs. bad smoke wood: oak, beech, maple, alder, and all dense hardwoods work well. Never use softwoods/conifers (pine, fir, spruce): their resin produces harsh soot that creates a bitter taste and can irritate your lungs. See the firewood species comparison to identify what’s around you.
- Cold smoking (20–30 °C): the meat remains raw, requires prior salting, and demands real expertise—health agencies advise against it without experience because bacterial risks run high at this temperature range.
- Hot smoking (52–80 °C): cooks the meat as it smokes, making it safer for beginners, though it has a shorter shelf life.
Salting
Salt lowers the water activity available to microorganisms through simple osmosis: a concentration of around 20% salt surrounding meat blocks most putrefying bacteria. In practice, rub the meat generously with salt or submerge it in a strong brine (dense enough that a raw egg floats, the traditional test), letting it cure for several days in a cool spot before rinsing and drying.
Finding salt when you’ve run out
- Evaporated seawater: pour seawater into shallow pans (dug in sand or stretched on a tarp), letting the sun concentrate the salt until it crystallizes—the basic principle of salt marshes, sped up on a small scale. Away from the coast, boil seawater in a heatproof container until dry: it works, but consumes a huge amount of wood for very little salt.
- Plant ashes: wood ashes, rich in potash (potassium carbonate), don’t replace sodium chloride molecule-for-molecule, but supply a salty-mineral flavor and electrolytes; it’s a proven fallback historically used when real salt was unavailable.
- Natural salt licks: mineral deposits where deer, moose, and other herbivores gather to lick salt, easy to spot by converging game trails. Whitish ground or a rock polished smooth by licking: taste cautiously with the tip of your tongue before harvesting.
Fats: essential, not a luxury
A diet devoid of fat quickly leads to exhaustion, even when total calories appear adequate—this is the mechanism behind “rabbit starvation,” or protein poisoning caused by consuming only lean meat. Fat is your densest energy store, and the critical binding agent in pemmican.
Rendering fat: chop adipose tissue into small pieces, heat gently (never on high heat, which burns and turns it acrid) until liquid fat separates from solid tissues (cracklings, which are edible on their own). Strain and let cool: you get tallow that keeps for weeks in a cool place.
Bone marrow, extracted by cracking long bones after light cooking, is one of the most nutrient-dense, accessible fats on a carcass—hunter-gatherers worldwide, from Inuits to San peoples in southern Africa, prized it as a delicacy.
Cold storage without a refrigerator
- Stream cache: a weighted net or waterproof bag submerged in cold running water or secured under a stream bank keeps temperatures close to the water’s temperature—often below 10 °C even in summer—much cooler than ambient air.
- Snow cache: dig down to a stable snow layer, bury wrapped food away from direct sunlight; snow insulates and maintains a steady temperature near 0 °C day and night.
- Underground pit (improvised root cellar): a shallow, shaded pit lined with fresh vegetation, covered with a board and earth, mimics traditional root cellars aiming for 0–2 °C and high humidity for roots and tubers.
- Bear hang / bear cache: suspend food at least 4.5 m (15 ft) high and 3 m (10 ft) out from any tree trunk (counterbalance method or Appalachian Trail style), well away from your sleeping area. Bears climb well and chew ropes: in heavy bear country, a certified bear-resistant canister is far safer than a simple rope hang.
Fermentation: powerful, but risky without know-how
Controlled fermentation (sauerkraut, kombucha, sourdough) preserves remarkably well by acidifying the medium, making it hostile to most pathogens. Danger arises when fermentation occurs without air, without sufficient acidity, and without temperature control: that is the exact environment where Clostridium botulinum, the botulism bacterium, thrives.
What kills: food poisoning
| Staph infection | Botulism | |
|---|---|---|
| Onset time | 1 to 6 hours | 12 to 72 hours (up to 10 days) |
| Cause | Heat-stable toxin formed in food before cooking | Toxin produced in anaerobic environment (canned, poor fermentation) |
| Symptoms | Nausea, severe vomiting, cramps, diarrhea | Double vision, descending weakness, paralysis |
| Resists cooking? | Yes, pre-formed toxin survives heat | Toxin destroyed by heat, spores survive |
| Severity | Rarely fatal, very uncomfortable | Potentially fatal without medical care |
Staphylococcus aureus produces toxins directly inside improperly stored food (cooked meat left at room temperature, dairy products)—and this toxin survives subsequent cooking: heat kills the bacteria, but not its poison. This is why cooked food should never sit at room temperature for hours, even if you plan to “recook” it later.
Botulism is rarer but far more severe: paralysis begins in the face (double vision, difficulty swallowing) and moves down the body. Experiencing these symptoms after consuming home-canned or improperly fermented food constitutes a life-threatening emergency—there are no wilderness remedies; only medical administration of antitoxin saves lives.
Kitchen hygiene in survival
- One cutting board and knife for raw; another set for cooked if you have the gear—otherwise, wash thoroughly between uses.
- Don’t throw away cooking water: broth from vegetables, fish, or meat retains water-soluble minerals and vitamins that would otherwise be lost. Drink it, or use it as a soup base.
- Wash hands before handling raw food: the single biggest failure point in survival camps, where clean water is scarce and people skip handwashing to save water.
- A discrete cooking fire when smoke or light poses a tactical or safety concern (near hostile areas or needing low visibility): opt for a Dakota fire pit (detailed in the fire module), which produces little visible smoke and hides flames underground.
Improvised utensils
- Select a piece of soft, non-resinous wood (willow, linden, birch) free of knots where the hollow will be.
- Place a glowing ember on the spot you wish to hollow out, surrounded by a ring of ash to keep it from burning outward too fast.
- Blow gently and steadily to keep the ember burning downward: the wood chars, forming a depression.
- Scrape away the charred wood using a shell, flat stone, or the spine of your knife—never the sharp edge, which will dig into sound wood.
- Repeat the ember-and-scrape cycle until you reach the desired depth, keeping the walls thicker than the floor.
This “burn bowl” technique, historically used to hollow out dugouts, bowls, and spoons before metal tools existed, allows you to carve hard wood without sharp edge tools. A thick bark spatula, carved with a knife from a piece of rigid tree bark, works well for flipping flatbreads on a hot rock without burning your fingers.
Frequently asked questions
Can you eat raw cassava?
No, absolutely not, especially bitter varieties: raw cassava contains cyanogenic glycosides that release hydrogen cyanide. Peel it, grate it, soak or ferment it for at least 24 hours, and cook it thoroughly before eating.
Why should you never use river rocks for cooking?
River rocks are often porous and saturated with water; when heated, trapped water turns to pressurized steam, causing the rock to explode and hurl sharp, hot shrapnel. FM 21-76 explicitly forbids rocks with air pockets like limestone or sandstone; choose dense, long-dry rocks gathered far from water.
How do you make pemmican, and why does it keep for years?
Dry lean meat until brittle, pound it into powder, then mix it equal parts by weight with rendered animal fat (and optional dried berries), packing it tightly into an airtight container. Fat shields the meat from air and moisture, halting decay; Boer War pemmican rations were recovered intact after decades.
How can you preserve meat without a refrigerator?
Three complementary methods: drying (6 mm thin strips in sun and wind, lasting weeks), smoking (hardwood smoke, never softwoods, lasting 1 to 4 weeks depending on duration), and salting (roughly 20% salt by weight, lasting months). Combined together or mixed with fat (pemmican), these methods preserve meat for months or years.
How do you identify severe food poisoning in the wilderness?
Vomiting and cramps appearing within 1 to 6 hours suggest staphylococcal toxin—miserable, but rarely fatal. Double vision and descending weakness spreading from face to limbs 12 hours to several days after eating home-canned or fermented food indicates botulism—a life-threatening emergency requiring immediate evacuation.
Do you really need to cook all wild foods?
Systematically cook anything you aren’t 100% sure is safe raw: cooking kills parasites and neutralizes tannins, saponins, and cyanide in cassava or bamboo. Foods you know with certainty can be eaten raw (most berries, specific identified shoots) are the exception, not the rule.
Key takeaways
- Cook everything unless you are 100% certain it can be eaten raw: heat neutralizes parasites, tannins, saponins, and cyanide in cassava or bamboo shoots.
- Never put river or porous rocks on a fire: they can explode. Seek out dense, bone-dry rocks gathered far from water sources.
- Pemmican lasts for years thanks to fat (1:1 ratio with dried meat); without fat, it’s just fragile jerky.
- Drying, smoking (never with resinous wood), and salting (~20%) combine to preserve without refrigeration; improvised fermentation risks botulism, a medical emergency.
- Drink your cooking water, cache food far from your shelter, and remember that a stone, clay, or a leaf is all you need to cook without pots.
Going further
- FM 21-76, US Army Survival Manual, Chapter 9 “Food”—cooking without utensils and the ban on porous rocks in a few concise pages.
- Mors Kochanski, Bushcraft: Outdoor Skills and Wilderness Survival—field techniques from firecraft to camp cookery, the gold standard of North American bushcraft.
- Wild Foods Comparison—nutritional values of what you’ll be cooking.
- Firewood Comparison—which woods to pick for smoking, and which to strictly avoid.
Sources for this module (29)
- FM 21-76 US Army Survival Manual, ch. 9 Food
- Mors Kochanski, Bushcraft: Outdoor Skills and Wilderness Survival
- Wikipedia — Stone boiling
- Wikipedia — Pemmican
- Wikipedia — Bannock (food)
- Wikipedia — Cassava (toxicité cyanogénique)
- Wikipedia — Acorn (lessivage des tanins)
- Wikipedia — Bamboo shoot
- Wikipedia — Hāngī
- Wikipedia — Earth oven
- Wikipedia — Kiviak
- Wikipedia — Botulism
- ANSES — Le botulisme
- Wikipedia — Jerky
- Wikipedia — Smoking (cooking)
- Wikipedia — Curing (food preservation)
- Wikipedia — Food drying
- Wikipedia — Typha (massette)
- Wikipedia — Birch syrup
- Wikipedia — Pine needle tea
- Wikipedia — Salt lick
- Wikipedia — Potash
- Wikipedia — Rendering (animal products)
- Wikipedia — Bear-resistant food storage container
- Wikipedia — Root cellar
- Wikipedia — Dugout canoe (technique du bol brûlé)
- Wikipedia — Entomophagy (FAO, insectes comestibles)
- Wikipedia — Fireless cooker
- Wikipedia — Staphylococcus
Continue in "Cross-cutting skills"
Knots and Cordage: The 10 That Actually Matter
3,857 knots listed in the reference book, and ten that are enough to pitch a shelter, scale a cliff, or save a life.
Knife, axe, saw: tools and the techniques that prevent injuries
The 'best knife' doesn't exist: only the one that fits your hand and your task—and the movements that keep you from getting hurt.
The Kit: What Should Be in Your Pockets, Backpack, and Car
What you carry on you saves you when you lose your pack: the kit hierarchy and essential checklists you shouldn't improvise.