Walking Far: The Body, Feet, and Pace
The most widely used survival skill in the world isn't lighting a fire: it's putting one foot in front of the other, for hours on end, without breaking yourself.
It’s 9 a.m., you’re heading out for a six-hour, twenty-kilometer walk, and you’ve just started too fast because the trail was pretty and the air crisp. By noon, your calves are burning, a suspicious hot spot is forming under your right heel, and you still have half the trail to go. None of this is inevitable: it’s neither a lack of fitness nor bad luck. It’s a skill you were never taught, even though it’s the oldest and most frequently used skill of all.
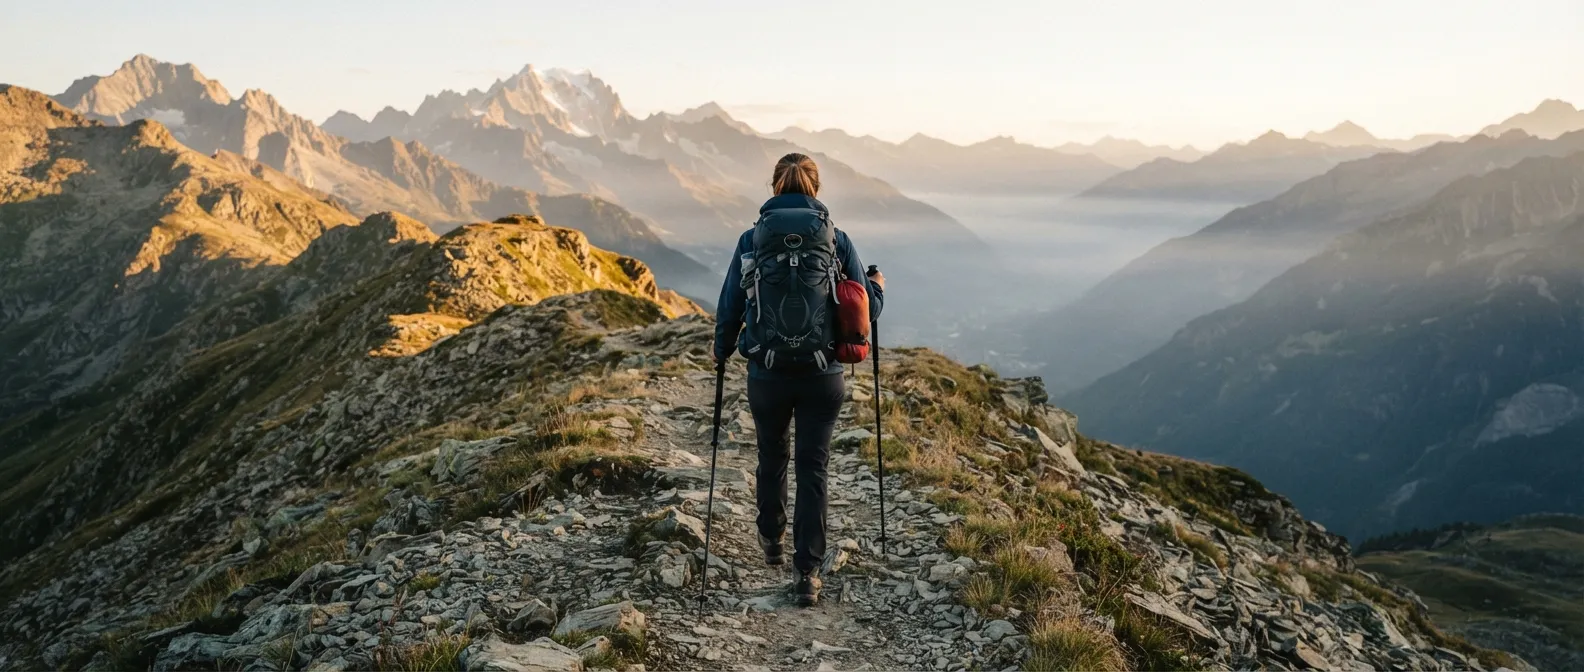
The number one survival skill
Before fire, before shelter, even before water, there is movement. Getting out of a danger zone, reaching a road, making it to a rendezvous point, descending before nightfall: in the vast majority of wilderness survival situations, the skill that wraps up the story is knowing how to walk—and knowing how to walk right.
And what kills you while walking is almost never what you’d expect. Mountain rescue reports, in France and worldwide, are unambiguous: falls, cardiac events, and hypothermia dominate hiking accident and fatality statistics by far, leaving animal attacks far behind as mere anecdotes. In France, the High Mountain Gendarmerie Platoons (PGHM) perform an average of 5,400 interventions per year, covering the bulk of high-altitude mountain rescues in the country. A bear or a wolf almost never appears in these reports; a twisted ankle on a scree slope, a heart failing under exertion at altitude, or a body cooling down rapidly after slipping into a mountain stream certainly do.
Pacing: the mountaineer’s step
A beginner’s instinct is to walk fast at first because it feels easy, only to pay for it heavily by the end of the day. Mountain guides have always taught the exact opposite: a slow, steady pace you can sustain for hours, without speeding up or slowing down as the terrain changes. This is what’s known as the mountaineer’s pace, found in one form or another in every mountaineering manual, starting with Mountaineering: The Freedom of the Hills—the landmark North American manual published since 1960 by The Mountaineers of Seattle, where an entire chapter (“Wilderness Travel”) is dedicated to travel in rugged terrain.
The rest step: resting on bone, not muscle
On steep ascents, the technique that changes everything is the rest step. The principle: with every step, your rear leg locks fully into extension for a split second before your body weight shifts onto it—the locked knee joint supports your body on bone and ligament rather than on contracting muscle. This micro-pause, virtually invisible to an observer, gives blood enough time to flush through your calf and thigh before the next exertion. High-altitude climbers pair this with pressure breathing: a forced exhalation through pursed lips that maintains positive pressure in the lungs and improves oxygen exchange when the air thins out. One step, one full breath, locking the leg: it’s slow, and that’s precisely why it lasts.
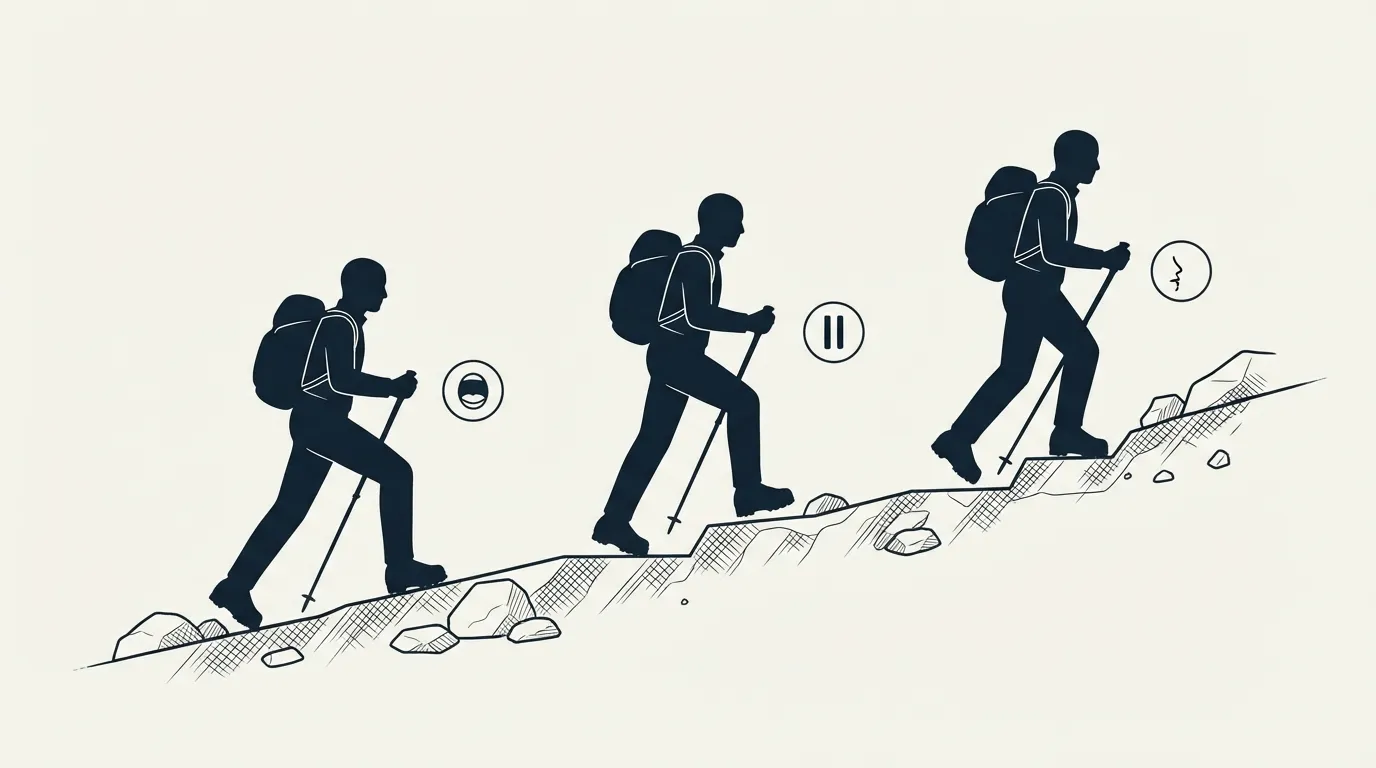
The break rule: 5 minutes every 50 minutes
Taking a ten-minute break sitting in the grass feels great in the moment but costs you dearly afterward: your muscles cool down, stiffen, and getting moving again is harder than having kept going. The rule taught in hiking schools and outdoor organizations is simple: about 5 minutes of rest for every 50 minutes of walking, standing or barely sitting down—just enough time to drink, grab a bite, or tighten a shoelace—never long, lying-down breaks that let your body chill before the next stretch.
How long, really: Naismith and his adjustments
The world’s most widely used formula for estimating hiking time dates back to 1892, devised by Scottish climber William W. Naismith, founder of the Scottish Mountaineering Club. Naismith’s rule fits in a single sentence: allow one hour for every 5 km (3 miles) covered on flat ground, plus one extra hour for every 600 m (2,000 ft) of elevation gain—translating per kilometer to roughly 12 minutes per km plus 10 minutes per 100 m of climb.
The issue with Naismith: he calculated his rule for a fit, well-trained walker on a clear trail. A century later, Tranter’s corrections adjusted it for real life: they measure fitness using a simple test (the time taken to climb 300 m over a distance of 800 m) and scale Naismith’s time accordingly—a highly fit walker (15 minutes on the test) can reduce Naismith’s estimate, while an unfit walker (50 minutes on the test) may need to double the predicted time. Other refinements go further: Aitken reduces the pace to 4 km/h on rough off-trail terrain, while Langmuir adds time on steep descents but subtracts time on gentle downhills, where you move faster than on flat ground.
Feet: where everything is decided
A heavy pack can be endured. A poorly placed blister can stop a trek in its tracks within an hour. Feet are, by far, the most common weak point in long-distance walking—and the most well-documented: American author John Vonhof devoted an entire book to the topic, Fixing Your Feet, which became the go-to reference for ultra-trail runners and long-distance hikers, updated continuously since its first edition in the 1990s using feedback from thousands of runners.
Blisters: friction, heat, and moisture
A blister is a separation of skin layers filled with fluid to protect the damaged underlying tissue. Three factors combine to trigger it: repeated friction (the foot sliding slightly inside the shoe with every step), the resulting heat, and moisture, which softens the skin and increases the friction coefficient—damp skin breaks down much faster than dry skin or completely soaked skin. This combination, well documented in dermatology, explains why blisters almost always form under the same conditions: brand-new or poorly fitted shoes, cotton socks that hold moisture, and long distances in warm weather.
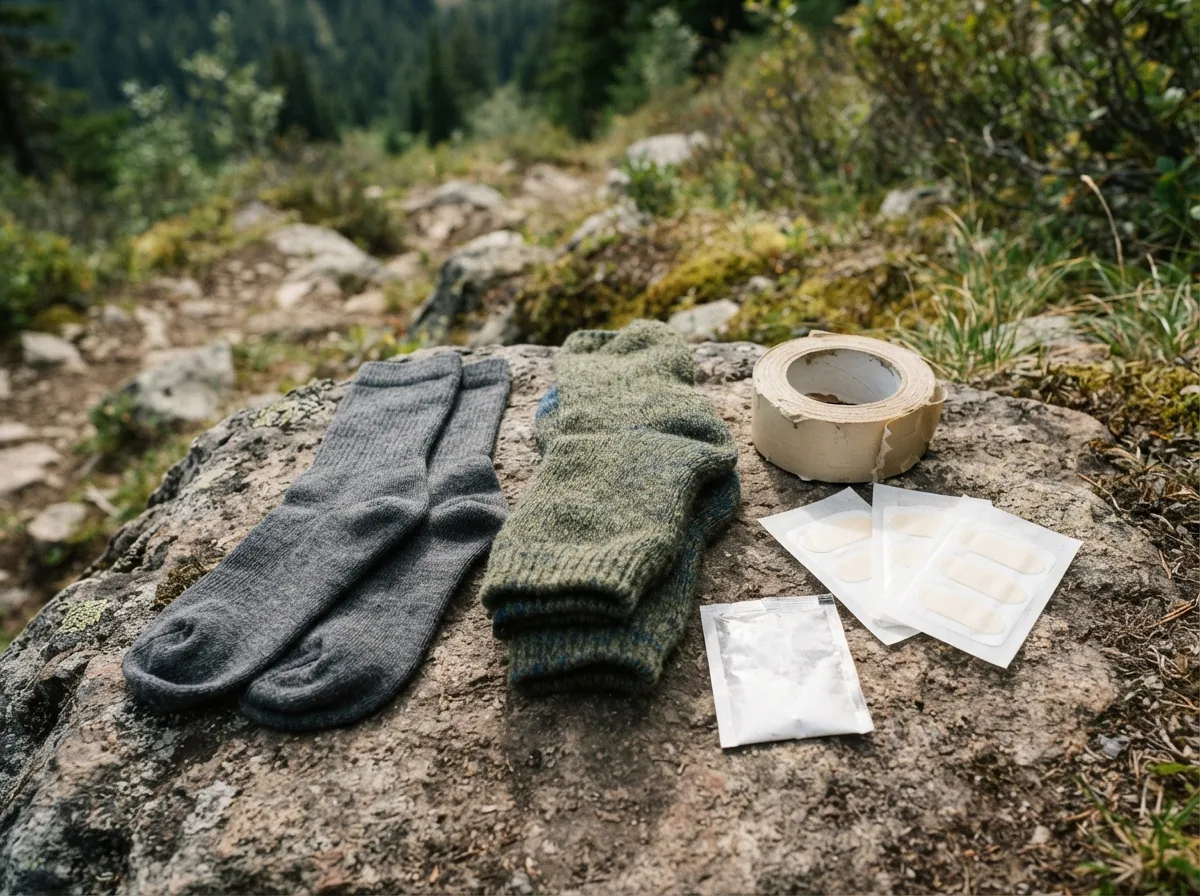
- Break in your shoes before leaving: never wear brand-new boots on a long hike; your first long outing should always be in gear you’ve already tested.
- Layer a thin liner sock (which wicks moisture away from the skin) under a thicker outer sock: friction occurs between the two socks rather than between sock and skin.
- Identify your usual hot spots—your heel, pinky toe, or under the ball of the big toe—and cover them before setting off using Leukotape or a hydrocolloid bandage like Compeed, not after the burning starts.
- Dry your feet during pauses whenever possible, switch socks if they are soaked with sweat or rain, and pack an absorbent powder (talc, cornstarch) for long, hot stretches.
Treating a blister: to pop or not to pop
Opinions differ, but the answer depends on size. A small, painless blister should be protected and left alone—the intact roof of skin is your best natural shield against infection. For a large, tense blister that hurts with every step, wilderness medicine guidelines (Wilderness Medical Society) and ultra-runner practices agree on a drainage without deroofing protocol: drain the fluid, but keep the skin roof in place as a natural bandage.
- Disinfect the skin and a needle (using a flame or alcohol).
- Puncture near the edge, not in the center, making one or two low points so fluid drains out by gravity.
- Gently press to evacuate all the fluid without tearing off the skin roof.
- Cover with an appropriate bandage (hydrocolloid like Compeed, or gauze + Leukotape) and watch for signs of infection over the coming days—spreading redness, heat, or pus.
Toenails and foot swelling
On long downhills, toes repeatedly bumping against the front of your shoe can cause micro-trauma and pooling blood under the nail (subungual hematoma)—painful, though rarely serious, and easily prevented by lacing tightly across the instep to lock your foot back (see heel lock lacing below). Your feet also swell naturally over a day of walking, expanding up to a full shoe size by the end of an stage: that’s why experienced hikers buy footwear at the end of the day, when their feet are already slightly swollen, rather than in the morning.
Trench foot: cold and wet, not freezing
Trench foot (or immersion foot) has nothing to do with frostbite: it occurs without sub-zero temperatures, through prolonged exposure to damp cold at temperatures as high as 16 °C (61 °F) according to controlled studies, developing in as little as ten hours in severe conditions. Soaked boots or socks combined with an immobile foot in the cold are the main culprits: blood circulation drops, tissues suffer from lack of oxygen, and the skin turns numb, then red or bluish, swells, and can progress to blisters and open sores if untreated. Napoleon’s troops experienced this on a massive scale during the 1812 retreat from Russia, long before the condition earned its name in the trenches of World War I.
Footwear: stiff boots or trail runners?
| Trail runners (low-cut) | Mid-cut hiking boots | Stiff mountaineering boots | |
|---|---|---|---|
| Weight | Light | Moderate | Heavy |
| Ankle support | Low | Good | Very high |
| Best terrain | Well-maintained, dry trails | Varied terrain, moderate loads | Snow, crampons, off-trail |
| Break-in time | Almost none | A few short outings | Essential break-in period |
| Breathability | High | Moderate | Low (insulated) |
Low-cut trail runners work great for dry, well-defined trails carrying a light pack; mid-cut boots protect ankles as soon as the terrain becomes uneven or the pack grows heavy; stiff mountaineering boots built for crampons are only justified on snow, glaciers, or demanding off-trail routes. The most common mistake: choosing footwear that is far too stiff for gentle terrain, tiring your feet instead of protecting them.
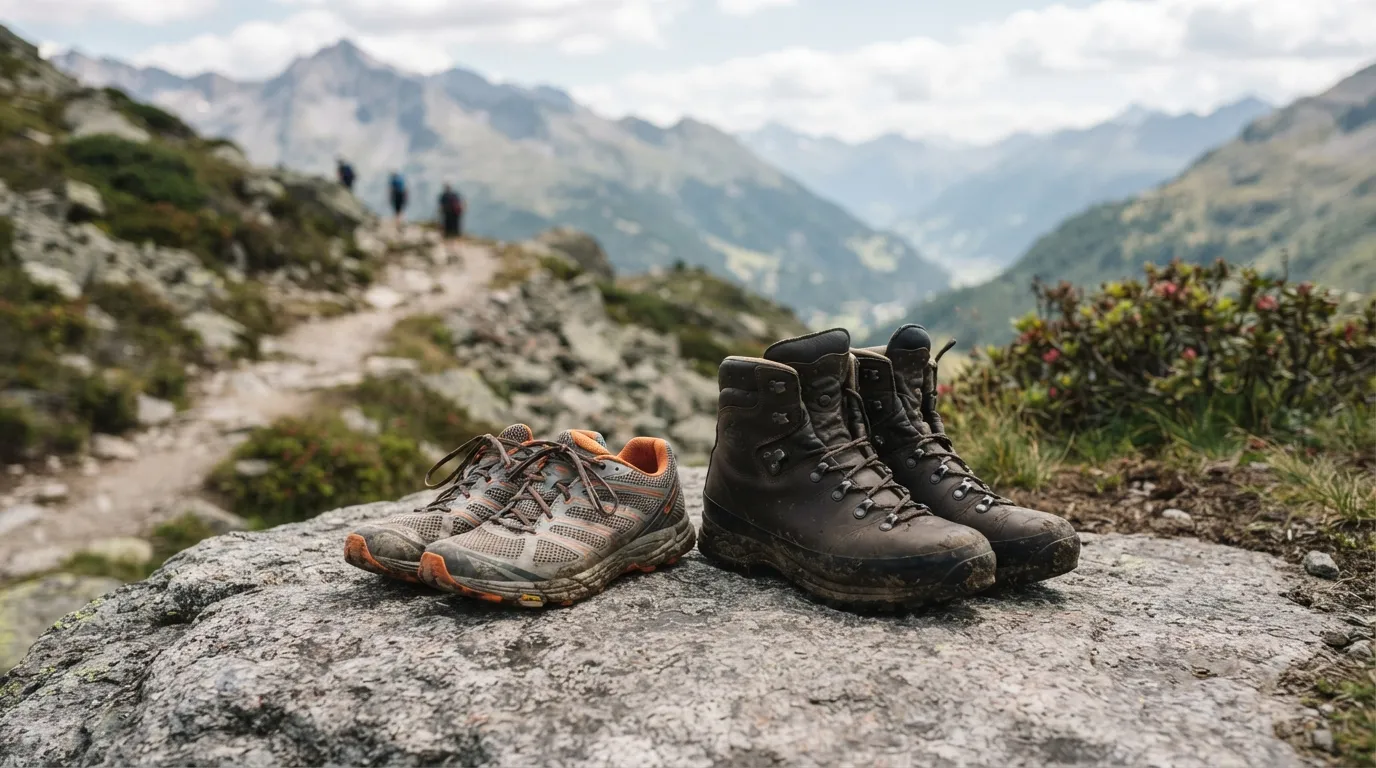
Heel lock lacing
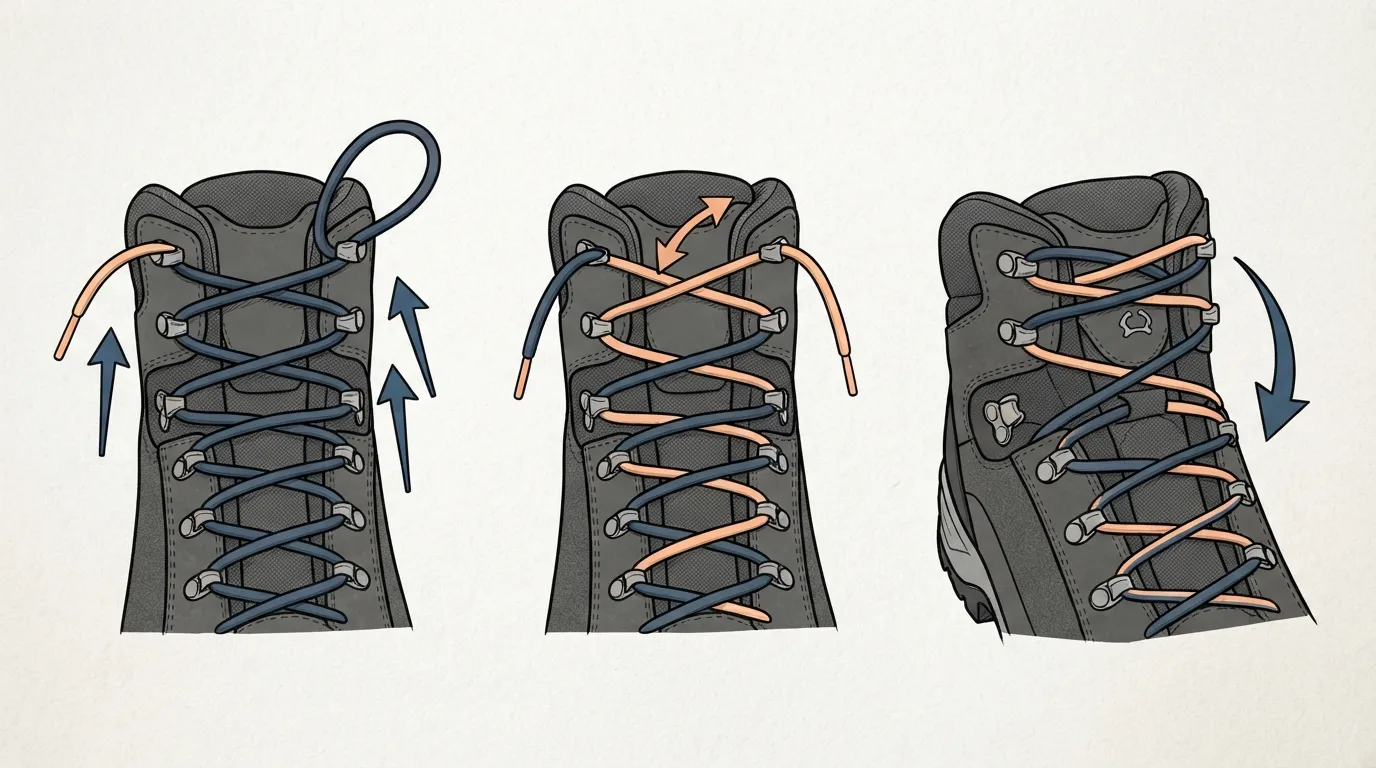
On descents, your foot slides forward inside the boot with every step: this is what blackens toenails and bruises toes. The fix is the heel lock (or lace lock) technique: near the top of the lacing, before tying your knot, thread each lace through the eyelet directly above it on the same side to create a loop, then cross the laces through those opposing loops before pulling tight—this lock prevents your heel from lifting and keeps your foot from jamming forward.
- Lace your boot normally up to the second-to-last eyelet on each side.
- Pass each lace end from the inside out through the top eyelet on the same side (without crossing over) to form a small vertical loop on each side.
- Cross the laces over and thread each end through the loop on the opposite side.
- Pull firmly downward on both ends before tying your standard knot: your heel is now locked firmly into the back of the boot.
Gaiters
Gaiters cover the top of your footwear and lower calf: they stop pebbles, sand, and snow from sneaking into your boots, and keep your pant cuffs dry when walking through wet grass. Low, lightweight gaiters work best for gravel and brush, while tall, waterproof ones are built for deep snow—a simple detail that prevents the moisture known to directly trigger blisters and trench foot.
Your pack: let your hips carry the load
A poorly adjusted pack turns a pleasant trek into shoulder torment, even though the human skeleton is designed to carry loads on the pelvis, not the traps. Once properly adjusted, packs weighing over 10 kg transfer up to 90% of their weight onto the hip belt, leaving the shoulder straps to merely balance the load and prevent the pack from tipping backward.
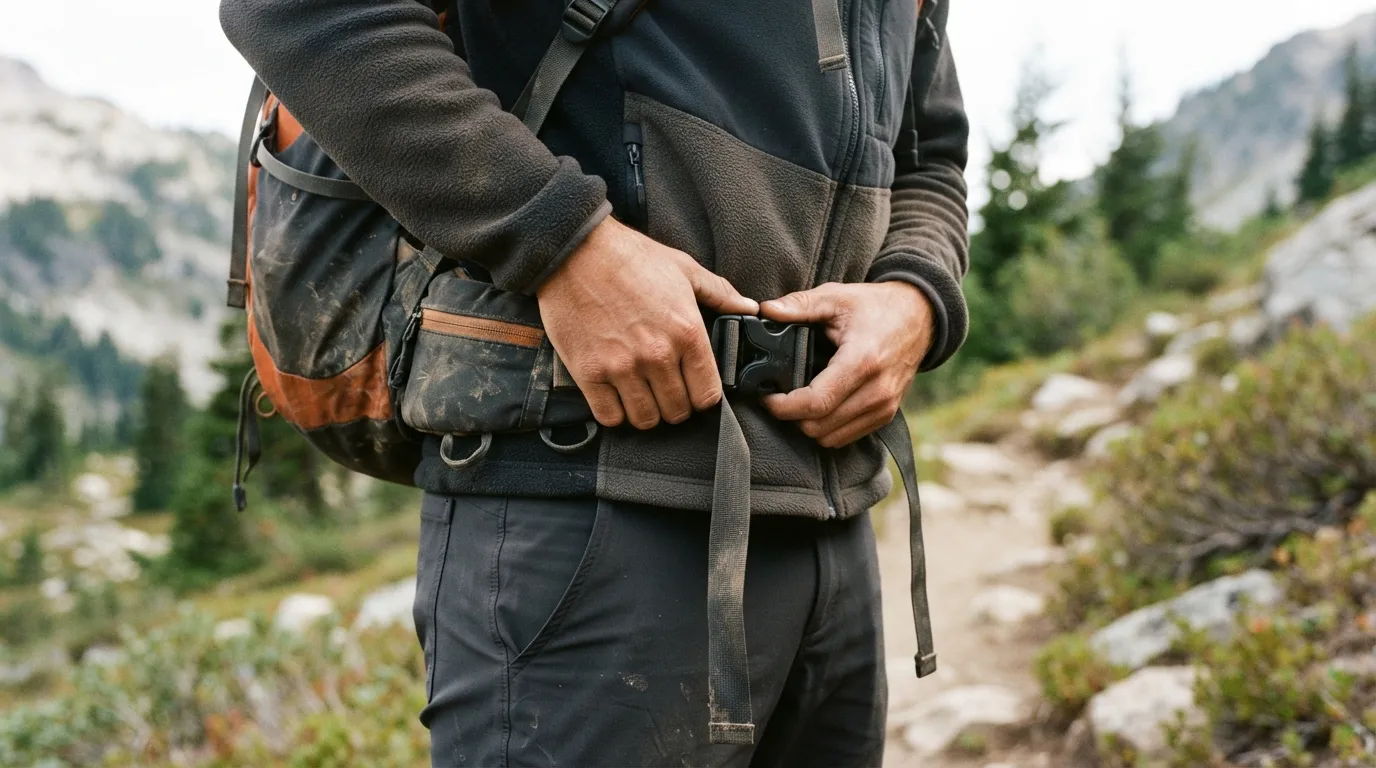
- Loosen all straps before putting it on: hip belt, shoulder straps, and load lifters.
- Position the hip belt over your pelvic bones (the iliac crests)—not your stomach—and cinch it tight first.
- Adjust the shoulder straps next, pulling just enough so they touch your shoulders without taking the main weight.
- Tighten the load lifter straps (at the top of the shoulder straps) to pull the top of the pack closer to your back, moving its center of gravity closer to your body.
- Check: if you lift up slightly on the shoulder straps, the load should stay firmly on your hips rather than shifting onto your traps.
When packing inside: place heavy items against your back and high in the pack (near your shoulder blades) to keep the center of gravity close to your spine and minimize backward pull; place light, bulky gear (sleeping bag, extra clothing) at the bottom; keep items you use throughout the day (map, snacks, rain shell) easily accessible in top pockets so you don’t have to unpack everything.
Trekking poles: 25% less joint load on knees
A landmark study on the subject, led by Austrian biomechanist Harald Schwameder and published in 1999 in the Journal of Sports Sciences, measured knee joint forces during downhill walking with and without trekking poles. The results: a 12% to 25% reduction in peak ground reaction forces, knee joint moments, and compressive forces within the joint. In short, poles aren’t just for balance: they mechanically relieve a joint that absorbs several times your body weight with every step downhill.
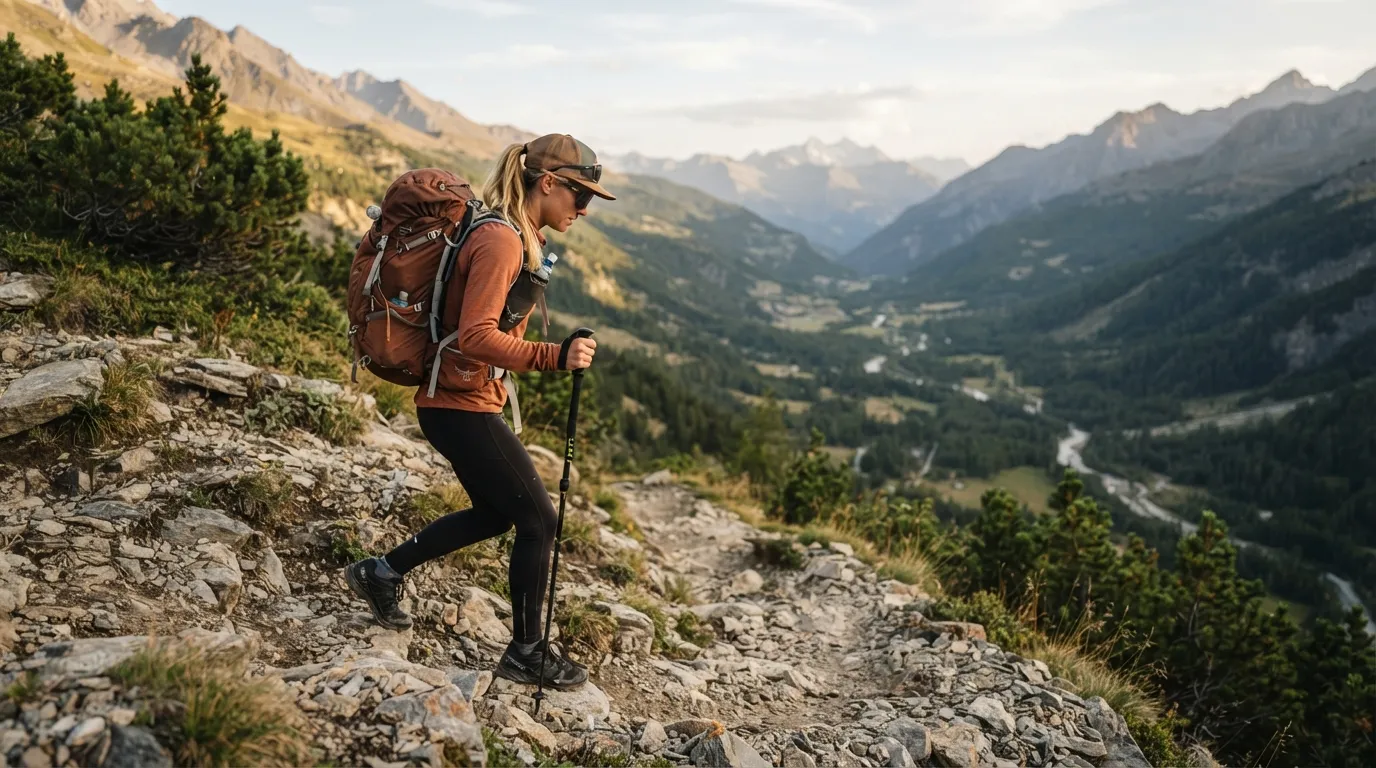
Uphill, move each pole in sync with the opposite leg (right arm with left leg) to help push yourself up; downhill, plant poles ahead of you to absorb part of the impact before your knees take the full load; during side-hill traverses, shorten the uphill pole and lengthen the downhill pole so your hands stay at equal height.
Terrain: matching your stride to the ground
Scree slopes and snowfields
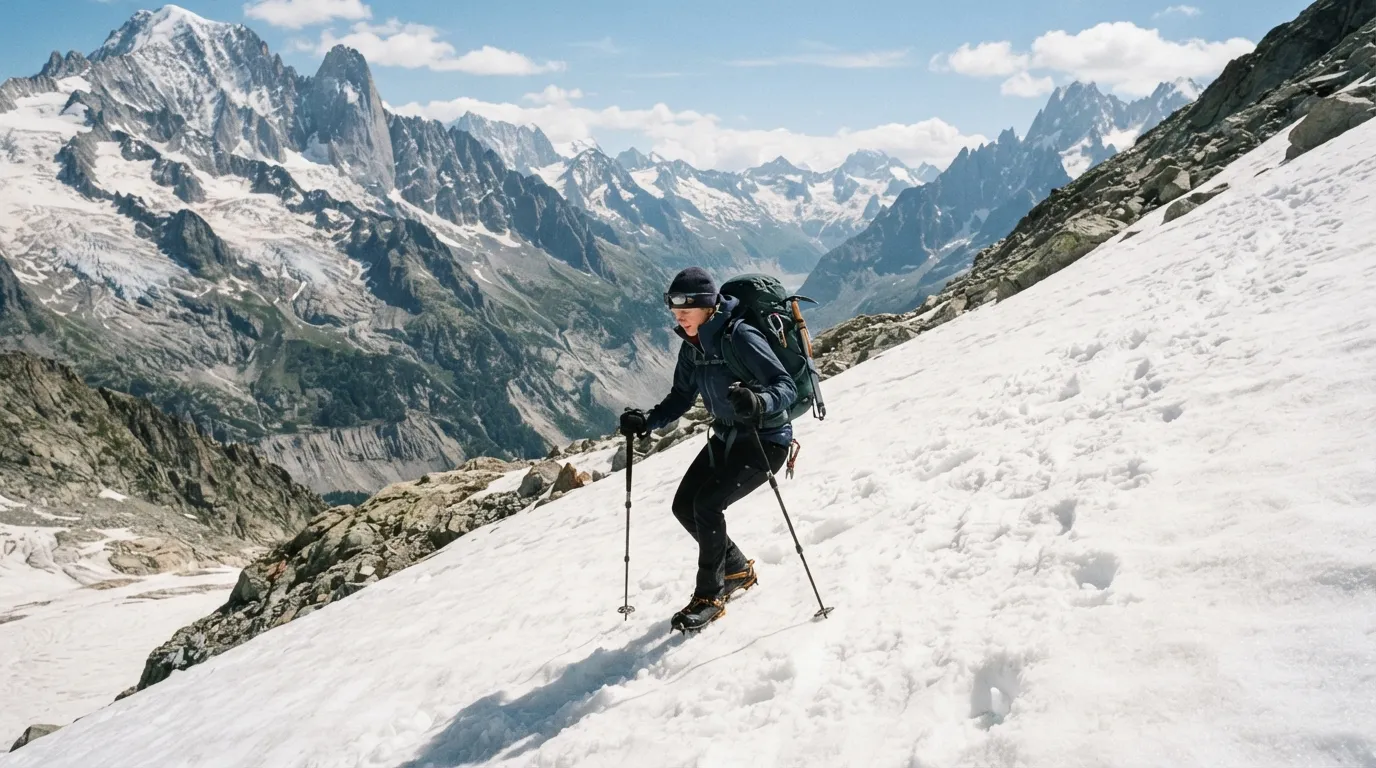
On scree (unstable loose rock), plant your foot flat—never on the toes or on a single isolated rock that could shift—and test every foothold before committing your full body weight. On hard-packed snowfields (névés) when descending, the technique flips completely: never land on your heels, which slide out easily and cause backward falls. Instead, descend using a controlled side-slip or plunge-step, knees bent, weight forward, kicking the outer edge of your boot firmly into the snow with each step to secure grip.
Brush, sand, and mud
Through dense brush, push branches aside using your forearms rather than barging through head-first, and slow down your pace significantly—the site’s Travel speed calculator breaks down these slowdowns terrain by terrain. On soft dune sand, walking in the tracks of whoever went before you or following ridge lines rather than depressions saves huge amounts of energy. In mud and bogs, every sinking step drains energy fast; probing the ground ahead with a pole prevents stepping into deep hidden holes.
Night walking
When walking off-trail at night, keep two habits in mind: angle your headlamp beam slightly ahead of your feet rather than far into the distance, and take shorter steps, which shorten your fall distance if your foot finds an unseen hole or root. Injury risks on the exact same terrain rise sharply at night, simply because your eyes can no longer anticipate obstacles ahead.
Crossing rivers
Ford crossing is a distinct skill set with its own hazards (selecting a ford, assessing current strength, unbuckling packs)—the site’s dedicated River guide covers the topic in full detail.
Food and hydration on the trail
A walking body burns fuel continuously: expect, as a rough rule of thumb, to burn 200 to 300 kcal per hour of walking depending on terrain and pack weight—a figure consistent with energy expenditures measured during multi-month expeditions, where overall daily energy burn rises far above baseline resting rates. For hydration, sweat loss can exceed 2 liters per hour during intense exertion in hot weather; during steady walking in heat, a practical baseline commonly taught in outdoor education is drinking roughly 0.5 liters per hour, adjusting for actual sweat rate and water availability.
Heat and cold while walking
In hot weather, physical exertion adds internal heat to external sun exposure: slowing your pace, walking during cooler hours, and seeking shade during breaks mitigates this heat build-up far better than trying to over-hydrate after overheating. In cold weather, the danger flips: a moving body generates heat, and stopping abruptly while soaked in sweat exposes you to rapid chilling—hence the golden rule of shedding a layer before you sweat excessively on an ascent, rather than arriving soaked at the top and freezing during a pause.
Walking while injured
A sprained ankle on the trail doesn’t automatically mean a helicopter rescue. The field protocol (adapted from the medical RICE protocol—Rest, Ice, Compression, Elevation—using whatever you have on hand) starts with firm taping: wrap the ankle using available materials (elastic bandage, torn clothing, straps) in a figure-eight around the heel to restrict lateral motion without cutting off circulation. A trekking pole or sturdy branch tucked under your arm acts as a makeshift crutch to unweight the injured leg. If pain allows slow, cautious walking, proceeding gently toward an easy evacuation point is often better than staying immobilized far from help—though this decision must be made case by case, without forcing through severe pain.
Walking with children
A child’s pace isn’t just an adult pace slowed down: it’s a completely different rhythm requiring frequent breaks and motivation driven by playful goals (spotting odd trees, counting cairns) rather than announced distances. Beyond a certain age or fatigue level, carrying gear or the child (using an ergonomic child carrier for toddlers, or simply lightening their load) keeps the outing from turning into an ordeal—a short distance leaving happy memories is always better than pushing for mileage that ruins their desire to return.
Unplanned nights: forced bivouacs
When night falls before you reach your destination, it’s far safer to stop and set up an improvised bivouac than to blunder blindly through terrain you can no longer see.
- Decide early: as soon as daylight fades and your destination remains uncertain, stop while there is still enough light to pick a good spot.
- Select flat, wind-sheltered ground away from dry riverbeds (flash floods) and summits exposed to lightning.
- Insulate yourself from the ground: anything used as a sleeping pad (branches, empty pack, spare clothes) reduces heat loss through ground conduction, which is often far more dangerous than cold air.
- Shield yourself from wind and wet using whatever is available: a tarp, poncho, or dense foliage.
- Signal your position if you are expected: leaving a note at the last clear trail junction or displaying bright gear helps search teams find you come morning.
Group walking
A group that moves at the speed of its fastest hiker will consistently lose its slowest member, often without realizing it for hundreds of meters. The foundational rule taught in hiking clubs: the slowest walker sets the pace at the front, or at minimum controls the tempo, and the group regroups at every intersection or turn to avoid split-ups.
Records and long trails
| Pacific Crest Trail (USA) | Te Araroa (New Zealand) | Grande Traversée des Alpes (France) | |
|---|---|---|---|
| Length | 4,270 km (2,650 mi) | ≈ 3,000 km (1,860 mi) | 630 km (390 mi) |
| Total elevation gain | ≈ 149,000 m (488,800 ft) | not documented | ≈ 35,000 m (114,800 ft) |
| Average through-hike duration | 4 to 6 months | 3 to 6 months | 36 stages |
| Supported record | 46d 12h 56m (Karel Sabbe, 2023) | 31d 19h 41m (Karel Sabbe, 2025) | not documented |
These figures show the scale: even the world’s fastest supported trail efforts (like Karel Sabbe running Te Araroa in just over a month) demand averages well over 80 km (50 miles) a day—a pace far beyond the reach of normal hikers, whose Naismith baseline sits around 20 to 30 km a day on flat terrain. The completion rate for the full Pacific Crest Trail—roughly 14% of those who set off—serves as a reminder that long distances are won long before taking the first step.
Walking to get out: stay put or press on?
When you realize you’re lost, your first choice isn’t about walking—it’s about judgment: should you stay put and await rescue, or try to navigate back on your own? Wilderness search and rescue doctrine—notably developed by Robert Koester in his definitive work Lost Person Behavior, used to train search teams worldwide—distinguishes between lost-person categories: young children or confused individuals are statistically far more likely to be found if they stay still and visible, whereas an experienced hiker in full control of their faculties with a clear idea of their approximate position can reasonably attempt to navigate to a known feature. What never changes: make the call early before exhaustion sets in, and mark your location (ground signals, left notes, fixed points) to avoid complicating search efforts.
Fatigue and judgment
Stretching: myth vs. reality
Training for a trek
The best preparation for a long trek remains… walking, carrying a progressively loaded pack over terrain matching your goal (including elevation if your trek involves climbing). Experienced hikers stress a point often overlooked: train your feet and boots as much as your cardio by logging practice hikes in the exact gear you plan to use—shoes, socks, pack—to spot hot spots and fitting issues before day one of your trek, not during it.
Frequently asked questions
How many kilometers can you walk a day on a hike?
For an average hiker on a good trail with a reasonable pack, plan for about 20 to 25 km (12 to 15 miles) per day at a moderate pace, factoring in elevation gain using Naismith’s rule (one additional hour per 600 m of climb). Terrain, pack weight, and fitness can easily double or halve this number.
Why do I keep getting blisters even though my boots fit well?
More often than not, socks or moisture are to blame rather than the boots: cotton socks that retain sweat or feet that stay damp all day cause the sliding friction that forms blisters. Try combining a thin liner sock with a thicker outer sock, and apply preventive tape on known hot spots before they start burning.
Should you pop a blister?
A small blister that doesn’t hurt should be left alone; its intact skin roof protects against infection better than any bandage. A large, painful blister under pressure can be drained near its edge while keeping the skin roof intact as a natural cover, after disinfecting both the skin and needle.
Do trekking poles actually help?
Yes, and it’s backed by science: a 1999 biomechanics study (Schwameder et al.) showed a 12% to 25% reduction in knee forces during downhill walking with poles compared to walking without them. They aren’t just for balance—they provide real mechanical relief for your joints.
How long can you walk without taking a break?
The standard rule taught in hiking instruction is roughly a 5-minute break for every 50 minutes of walking, keeping stops short and frequent rather than long and rare: long seated breaks allow muscles to cool down, making restarting harder than taking short, regular pauses.
How do I know if I’m walking too fast at the start of a hike?
The classic sign is needing to breathe through your mouth continuously within the first few minutes: a true mountaineer’s pace is slow and steady enough to let you hold a conversation or breathe mostly through your nose, even on ascents. Starting too fast almost always comes back to haunt you late in the day.
Key takeaways
- Walking rarely kills through dramatic hazards (like wild animals): falls, cardiac events, and hypothermia account for the vast majority of documented mountain accidents.
- Pace yourself right from the start using a slow, steady rhythm (the mountaineer’s pace, rest steps on climbs), taking short, frequent breaks rather than long, rare stops.
- Your feet control everything: focus on prevention before pain (double socks, preventive taping), use broken-in footwear, and use heel-lock lacing on descents.
- Adjust your pack so your hips carry up to 90% of the weight instead of your shoulders, and use trekking poles to reduce knee strain by 12% to 25% on downhills.
- If lost, decide early whether to stay put or navigate out based on your situation—make a deliberate choice rather than wandering until exhausted.
Further reading
- John Vonhof, Fixing Your Feet: Prevention and Treatments for Athletes — the definitive reference for foot care in long-distance walking and running.
- Robert Koester, Lost Person Behavior (dbS Productions) — the foundational search and rescue text on lost-person psychology and movement patterns.
- The Mountaineers, Mountaineering: The Freedom of the Hills — the landmark North American manual featuring comprehensive guidance on wilderness travel.
- The site’s Travel speed tool, to calculate travel times across different types of terrain.
Sources for this module (17)
- Naismith's rule — Wikipedia
- Blister — Wikipedia
- Trench foot — Wikipedia
- Backpack — Wikipedia (répartition du poids, ceinture ventrale)
- Trekking pole — Wikipedia
- Schwameder H. et al. (1999), Knee joint forces during downhill walking with hiking poles, Journal of Sports Sciences
- Pacific Crest Trail — Wikipedia
- Te Araroa — Wikipedia
- Grande Traversée des Alpes — Wikipédia
- Peloton de gendarmerie de haute montagne (PGHM) — Wikipédia
- Sprained ankle — Wikipedia (RICE)
- Dehydration — Wikipedia (pertes hydriques à l'effort)
- Stretching — Wikipedia (preuves scientifiques de l'étirement)
- March fracture — Wikipedia
- Tarahumara (Rarámuri) — Wikipedia
- Mountaineering: The Freedom of the Hills — Wikipedia
- Wilderness Medical Society — Wikipedia
Continue in "Cross-cutting skills"
Knots and Cordage: The 10 That Actually Matter
3,857 knots listed in the reference book, and ten that are enough to pitch a shelter, scale a cliff, or save a life.
Knife, axe, saw: tools and the techniques that prevent injuries
The 'best knife' doesn't exist: only the one that fits your hand and your task—and the movements that keep you from getting hurt.
The Kit: What Should Be in Your Pockets, Backpack, and Car
What you carry on you saves you when you lose your pack: the kit hierarchy and essential checklists you shouldn't improvise.